Uninterruptible Power Supply circuit

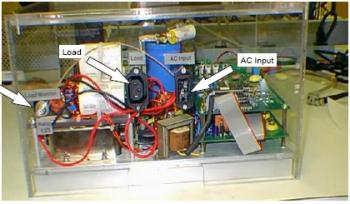
Here the Uninterruptible Power Supply (UPS) circuit with PIC17C43 microcontroller. Your UPS will be automatically controlled by the microcontroller.

Uninterruptible Power Supply circuit

UPS systems are traditionally designed using analog components. Today these systems can integrate a microcontroller with AC sine wave generation, offering the many benefits.

The PIC17C43 microcontroller handles all the control of the UPS system. The PIC17C43 is unique because it provides a high performance and low cost solution not found in other microcontrollers.

Download the document of Uninterrupted Power Supply
Comments

Anonymous said…
Wow here is really awesome pictures information about power supply circuit , I never work with PIC17C43 microcontroller so I very glad to knew that so thanks for sharing that nice one information.
ups installation
Unknown said…
Thanks for sharing. Good thing I found it here in your blog because I am fixing two UPS back home. I am using several UPS to protect my appliance and most especially my PC

Uninterruptible Power Supply

Popular posts from this blog

LM317T Voltage Regulator Circuit with Pass Transistor

This is the schematic diagram of voltage regulator circuit with pass transostor. The regulator is based regulator IC of LM317T. The LM317T output current can be raised by utilizing an additional power transistor (on circuit, it is 2N2955) to share a portion of the total current. The amount of current sharing is established with a resistor placed in series with the LM317 input and a resistor placed in series with the emitter of the pass transistor. In the above scheme design , the pass transistor will start conducting when the LM317 current reaches about 1 ampere, due to the voltage drop across the 0.7 ohm resistor. Current limiting happens at about 2 amperes for the LM317 which will drop about 1.4 volts across the 0.7 ohm resistor and make a 700 millivolt drop across the 0.3 ohm emitter resistor. Thus the total current is limited to about 2+ (.7/.3) = 4.3 amperes.

Sealed Lead Acid (SLA) 12V Battery Charger with Current Limiting

This is the circuit design of Smart Sealed Lead Acid (SLA) 12V Battery Charger featuretwith Current Limiting. The charger uses a two step process for charging SLA batteries – a current limited ‘fast’ mode followed by a constant voltage ‘float’ mode. Maximum charging current is 1A. An onboard LED indicates when the charger is in ‘fast’ mode. When the LED goes out the battery is charged and the charger has switched to ‘float’ mode.

6V to 12V DC Voltage Doubler

Here is the 6V to 12V DC voltage doubler circuit design, it also called DC voltage miltiplier or DC to DC converter. This dc voltage doubler circuit will need about 2A from the 6V input supply to produce the full 800mA at 12V for the power output. This circuit is very useful to generate higher voltage from a low power source, but this circuit will deliver low output current. So it should only be used for low current driven applications. Also, the output voltage may be unstable, so a voltage regulator (IC78XX) of proper rating can be used regulation and smooth output. But voltage regulator IC itself consume some current, and reduce the deliverable current.